Set Up Your Company Workspace
Turn your PocketTech invitation into a running workspace: company profile, plan, and your first team invites, in about five minutes.
Getting started with PocketTech begins with an invitation. Once your account is approved, we email you a secure setup link, a signed URL that’s unique to you, that opens a short three-step wizard: your company profile, your plan, and your team. Start to finish, it takes about five minutes. Here’s what to expect at each step.
Before you start
Have your company basics handy: address, phone number, and the trades your company works. A logo is nice to have but optional (you can add it later). Keep the invitation email open, the setup link is tied to your address and can only be used by you.
Step 1, Open your setup link
Click Set up your company workspace in the invitation email. The wizard opens already tied to your email, you’ll see it filled in and locked on the account step, so there’s no risk of setting up under the wrong address. If the link ever reports that it’s invalid or expired, reach out and we’ll send a fresh one.
Step 2, Fill in your company profile
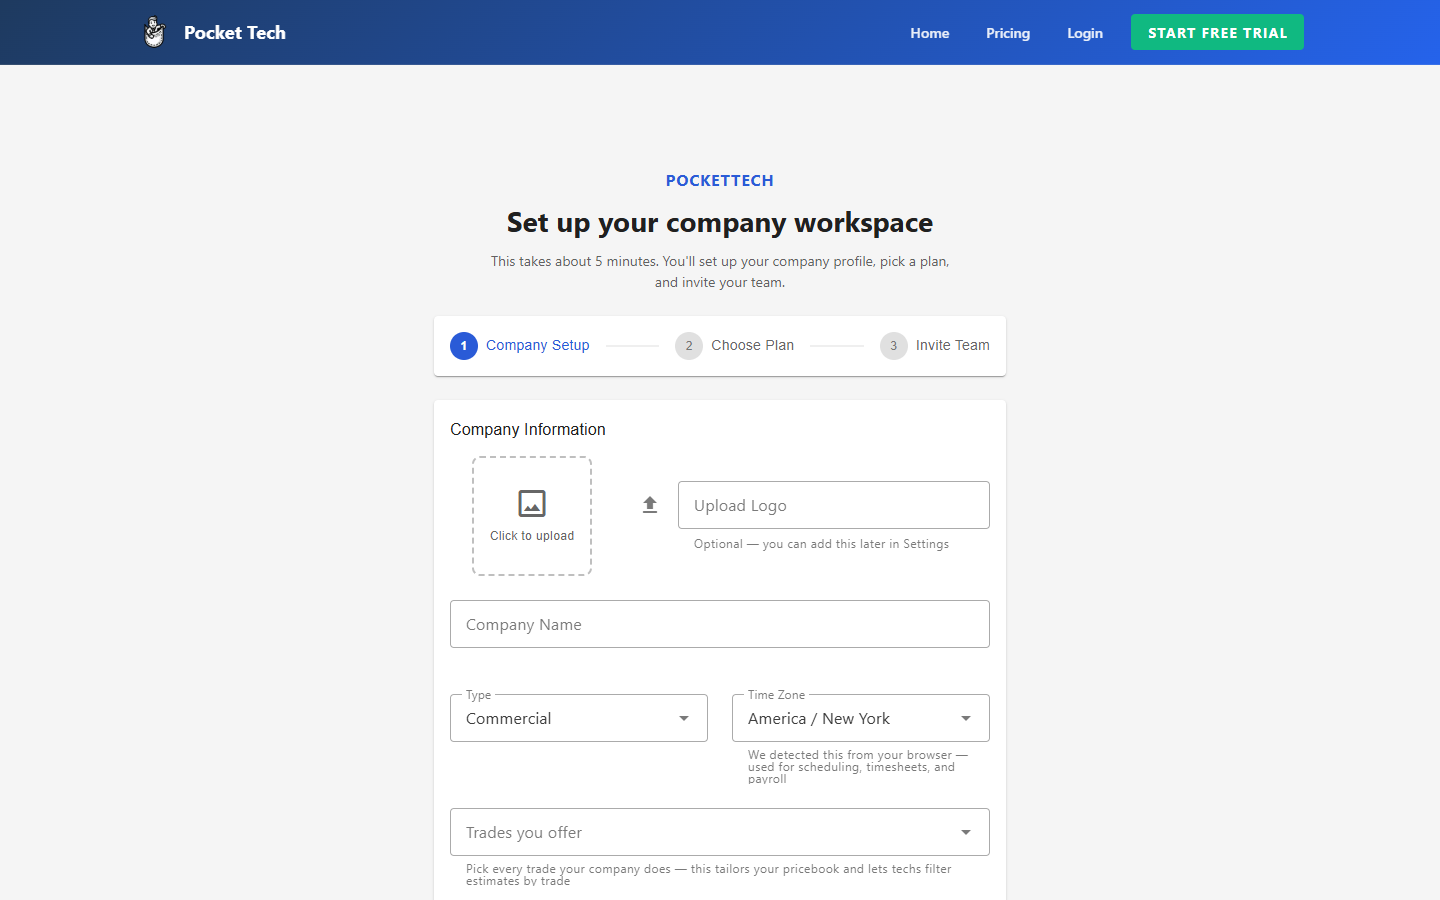
The first screen, Company Information, is what your customers and your own techs will see:
- Company name, type (Commercial, Residential, Industrial, or Mixed / Multi-Service), and time zone. We auto-detect the time zone from your browser, and it drives scheduling, timesheets, and payroll, so give it a quick check before moving on.
- Trades you offer. Pick every trade your company runs. This tailors your pricebook and lets techs filter estimates by trade, so it’s worth getting right up front.
- Address, phone, and company email. Your phone number shows on the estimates and invoices customers receive, and the optional website shows on customer-facing documents.
- Logo is optional here. Skip it now and add it anytime from Settings.
Step 3, Create your admin account
Under Admin Account, your email is already filled from the invitation and can’t be changed. Add your name and a password of at least 8 characters, then click Continue to Plan Selection. Your progress saves as you go, so stepping away won’t cost you the work you’ve done.
Step 4, Choose your plan
Pick monthly or yearly billing (yearly saves 17%) and set your seat count. Every plan starts with a 14-day free trial, no credit card required. Click Start Free Trial to continue, or choose I’ll choose later to jump straight to your team and settle billing afterward.
Step 5, Invite your team
The last step, Invite Your Team, shows your Available Seats. For each teammate, add their name and email and pick a role:
- Technician, field access
- Manager, scheduling and reporting
- Admin, full access and billing
Add as many people as your seats allow, then click Send Invites & Continue. Everyone you add gets an email to set their own password, no need to hand out logins. In a hurry? Choose I’ll add team later and invite the whole team afterward. When you’re done, Complete Setup drops you on your dashboard.
What happens next
Landing on your dashboard, you’ll see a short first-week checklist, add a vendor, create line items, set up a truck, build a form. Working through it is what turns a fresh account into one that can quote, dispatch, and invoice real jobs. The next guide walks through it.
What’s next
- Finish setting up your workspace, the first-week checklist.
- Create your first job once your team is in.
- Compare plans and pricing if you skipped plan selection.