Create Your First Job
Walk through creating a job in PocketTech: pick the customer and job type, then optionally schedule and assign the first appointment.
Jobs are the heart of PocketTech, everything from scheduling to invoicing flows from a job. Creating one is a quick two-step wizard: the job itself, then an optional first appointment. This guide walks through both.
Before you start
You’ll need at least one customer on file, since a job attaches to an existing customer (see Add your first customer). To schedule and assign the work right away, you’ll also want at least one technician on your team (see Invite and manage your team). You can always create the job now and schedule it later.
Step 1, Open the new job form
From the Dispatch sidebar, open Jobs, then click New Job. You can also start a job from a customer’s profile, which links it to that customer automatically.
Step 2, Fill in the job
The wizard opens on the Job step:
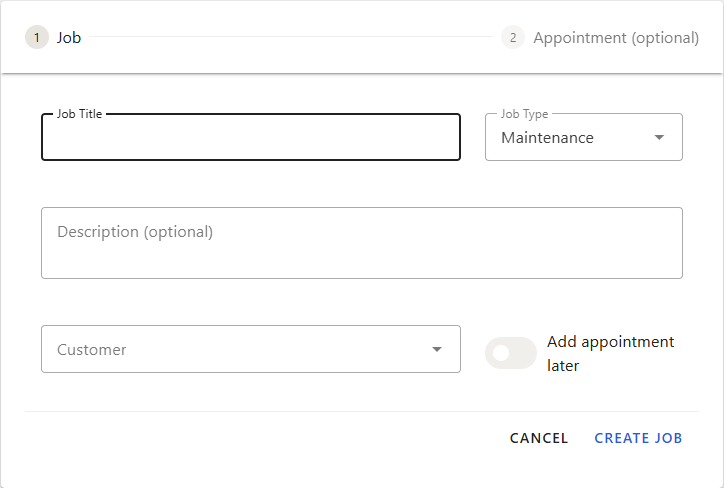
- Job Title, a short name for the work (“AC not cooling”, “Fall maintenance”).
- Job Type, one of Maintenance, Installation, Repair, Estimate, or Other.
- Description (optional), scope, context, or special instructions.
- Customer, search and pick the customer this job is for.
Then decide whether to schedule now. Leave Add appointment later on to save the job and schedule it from the board when you’re ready, and click Create Job. To book the first visit now, switch it to Add first appointment now and click Next.
Step 3, Schedule the first appointment (optional)
If you chose to add an appointment, the Appointment step collects the visit details:
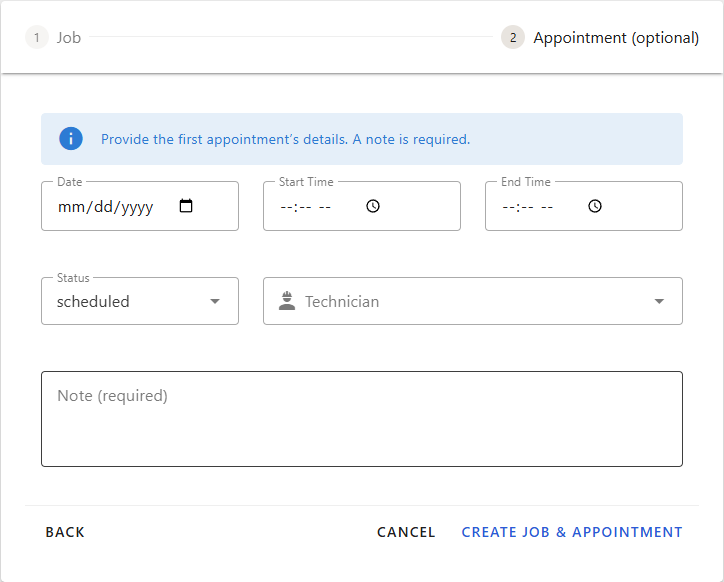
Set the Date, Start and End Time, a Status, and the Technician to assign. Add a Note (this one’s required), it’s what the tech sees before arriving, so include gate codes, symptoms, or anything useful on site. Click Create Job & Appointment to finish.
Step 4, Dispatch to the field
Once the job is scheduled and assigned, it pushes to that technician’s device, no phone call needed. As they work, their status flows back to your board in real time, so you always know who’s en route, on site, and finished.
What’s next
- Build your dispatch board to run the whole day from one screen.
- Learn how scheduling and dispatch work together in PocketTech.